The Professional Guide to Applying Silicone Sealant Bathroom
You have a leaking shower, or worse, you have black mold creeping out of the caulk line. You buy a tube of silicone sealant, spend an afternoon applying it, and six months later, you are back to square one.
The sealant is fine. Your process is the problem.
After twenty years dealing with failed joints, I can tell you this: Bathroom waterproofing is 90% preparation and 10% application. If the silicone fails to adhere, it is because you left residue or moisture behind. We are not filling a gap; we are creating a long-term, flexible, waterproof barrier designed to handle extreme heat cycles and daily chemical abuse.
This is the standard process we use on every job. Follow it, and your seal will last a decade.
Phase 1: Preparation is Non-Negotiable
This phase requires patience, tools, and a zero-tolerance approach to residue. Many DIY tutorials gloss over this. That is the fundamental failure point.
Step 1: Complete Removal of Old Material
You must remove every trace of the old material. That includes old silicone, old acrylic caulk, mildew, and paint overspray.
Use a utility knife or a specialized removal tool to cut and scrape out the bulk of the old sealant. Scrape the surface clean. You need access to the original, clean substrate—be it tile, porcelain, or fiberglass.
Critical Tooling: A dedicated solvent or silicone remover will dissolve the thin, invisible film that remnants leave behind. Acetone works in a pinch, but a commercial remover is superior for tackling thick residue left deep in the joint.
Step 2: Cleaning and Drying the Substrate
Silicone sealant adheres only to clean, dry, non-porous surfaces. Soap scum, mold spores, and cleaning chemicals are adhesion inhibitors.
- Disinfect: Apply bleach or a heavy-duty mildew cleaner directly to the joint. Let it dwell for the product’s full recommended time—do not rinse immediately. Scrub the area vigorously with a stiff brush to lift embedded mold.
- Rinse Thoroughly: Flush the area with clean water to remove all traces of cleaner and bleach. Any remaining chemical residue will destroy the curing process of the new sealant.
- Ensure Absolute Dryness: This is where amateurs rush. The joint must be bone dry. Use a hairdryer or a heat gun (on low, carefully) to ensure that the water deep within the grout lines or behind the tiles has evaporated. Wait 24 hours minimum after cleaning before application. If you apply silicone sealant bathroom joints while wet, it will fail within weeks.
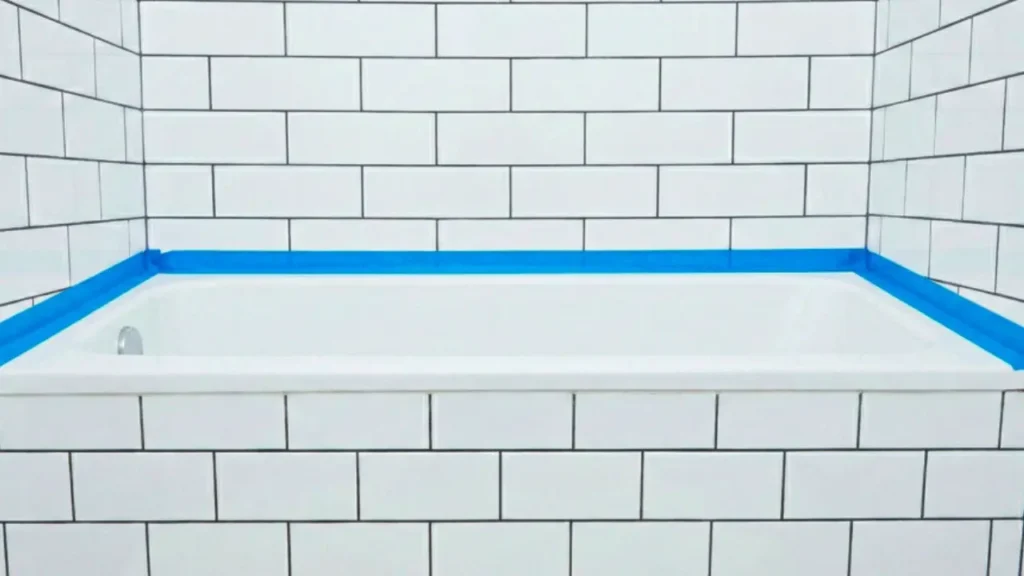
Step 3: Protecting the Surroundings
Masking tape is not optional; it is a quality assurance measure. Apply high-quality painter’s tape exactly along the edge of the joint you are sealing. The tape defines the width of your bead and, crucially, helps remove excess material cleanly, leaving sharp lines that look professional.
Phase 2: Application Strategy and Technique
The material is expensive, but application mistakes cost more in rework time. We apply once.
Cutting the Nozzle: The 45-Degree Rule
- Cut the nozzle at a 45-degree angle.
- Ensure the hole size is slightly smaller than the joint gap you are filling. You can always widen the bead later, but you cannot shrink it. Start small.
- Puncture the inner seal of the tube completely with a long nail or the built-in cutter on the caulk gun.
Loading the Gun and Maintaining Pressure
Use a high-quality caulk gun, preferably one with a rotating carriage and a thumb release for pressure. Apply continuous, even pressure.
The Push Technique is Mandatory.
You should push the gun toward the bead you have laid, rather than pulling it behind you. Pushing forces the silicone deep into the joint, ensuring full contact with both substrates, preventing air pockets, and establishing a robust mechanical bond.
- Start in an inconspicuous area to gauge your speed and pressure.
- Maintain a 45-degree angle of the nozzle relative to the joint.
- Move smoothly, establishing a consistent, uniform bead from corner to corner. Do not stop halfway through a run.
Phase 3: Tooling and Curing
This final stage separates a functional seal from a professional, long-lasting installation.
Do Not Use Your Finger
The old trick of wetting your finger and smoothing the bead is terrible advice. It pulls the material out of the joint, smears it thinly across the tape, and introduces contaminants from your skin.
Use a Dedicated Tool: Invest $5 in a silicone sealant finishing tool—a small plastic or rubber spatula designed specifically for this purpose. These tools are curved to scrape the perfect concave profile, pushing excess material outward while compressing the bead firmly into the joint.
- Dip the tool lightly in mineral spirits or denatured alcohol (never soapy water, which compromises the seal).
- Run the tool firmly and consistently along the length of the bead.
- Wipe the excess silicone from the tool onto a disposable rag frequently.
Removing the Tape
Timing is critical. Do not wait for the silicone to skin over or cure.
Once the bead is applied and properly tooled (within 5 to 10 minutes of application), pull the masking tape immediately. Pull the tape slowly, drawing it away from the sealant line at a sharp angle. This technique leaves a perfectly sharp, clean line without disturbing the freshly formed bead.
Curing the Seal
Allow the sealant to cure completely. Bathroom silicone sealants are moisture-curing, but humidity alone is not enough.
Consult the tube for the manufacturer’s instructions. General guidelines require 24 to 48 hours before exposing the area to running water. Do not test the seal. Do not take a shower. Ventilate the space well during the curing process.
You followed the protocol. You achieved proper adhesion. This is how quality waterproofing is executed.
Watch: Our Manufacturing Process
See how Weidu ensures every tube of sealant meets international quality standards in our fully automated factory.
Watch Video: Inside WEIDU FactoryGet a Professional Quote
Weidu for me, Weidu for you! Our choice is your commitment to quality.